Four steps to set up. Nothing to do per payment.
OrcaPayz sits between your server and your Stripe accounts. You keep the keys, the funds and the merchant of record.
Setup takes an afternoon.
No changes to your Stripe accounts. Each step is done once from the dashboard, then the API takes over.
-
01
Connect accounts
Add each Stripe account with its secret and publishable key. Give it a name, a priority, a weight and optional daily and monthly limits. Keys are stored encrypted and checked against Stripe on save.
-
02
Point pay.yourdomain.com at us
Create one CNAME record to edge.orcapayz.com and click Verify. TLS is provisioned automatically, and the Stripe webhook is registered only after the domain checks out.
-
03
Integrate the API
Create an API key pair, then POST /api/v1/payment-intents from your backend. Redirect the shopper to the checkout_url in the response.
-
04
Monitor
Watch transactions, account usage, refunds and disputes across every account in one dashboard. Receive signed webhooks in your own system.
Technical flow
What happens on every payment.
Six hops from your server to a confirmed payment. Everything the shopper and Stripe touch is on your domain. Everything you touch is one API.
-
01
Your app creates the intent
POST /api/v1/payment-intents
Your backend sends amount, currency, customer_email and return_url with your X-API-Key and X-API-Secret headers. Optional: metadata, a per-transaction webhook_url, or a payment_account_id to skip routing.
-
02
The router selects an account
traffic split + limits + health
Inactive accounts, unverified domains and accounts at their daily or monthly cap are filtered out. The remaining accounts are balanced by your traffic split. If none qualify, you get NO_AVAILABLE_ACCOUNT instead of a silent failure.
-
03
A PaymentIntent is created on that account
stripe.paymentIntents.create
OrcaPayz calls Stripe with the selected account credentials and stores the mapping. You receive transaction_id, checkout_url, client_secret and the account publishable_key in the 201 response.
-
04
The shopper pays on your domain
pay.yourdomain.com/checkout/{id}
The hosted checkout renders your branding and mounts the Stripe Payment Element under your hostname. 3D Secure runs when the issuer requires it. On success the shopper is redirected to your return_url.
-
05
Stripe confirms to your domain
pay.yourdomain.com/api/webhooks/stripe/{account}
Stripe delivers its webhook to an endpoint on your payment domain, one per connected account. We verify the Stripe signature and update the transaction status, paid_at and refund state.
-
06
You receive a signed webhook
X-Orcapayz-Signature: HMAC-SHA256
OrcaPayz POSTs the event to your account-level webhook URL and to the transaction webhook_url if set. Verify the signature, respond 2xx, and reconcile with GET /api/v1/payment-intents/{transaction_id} when needed.
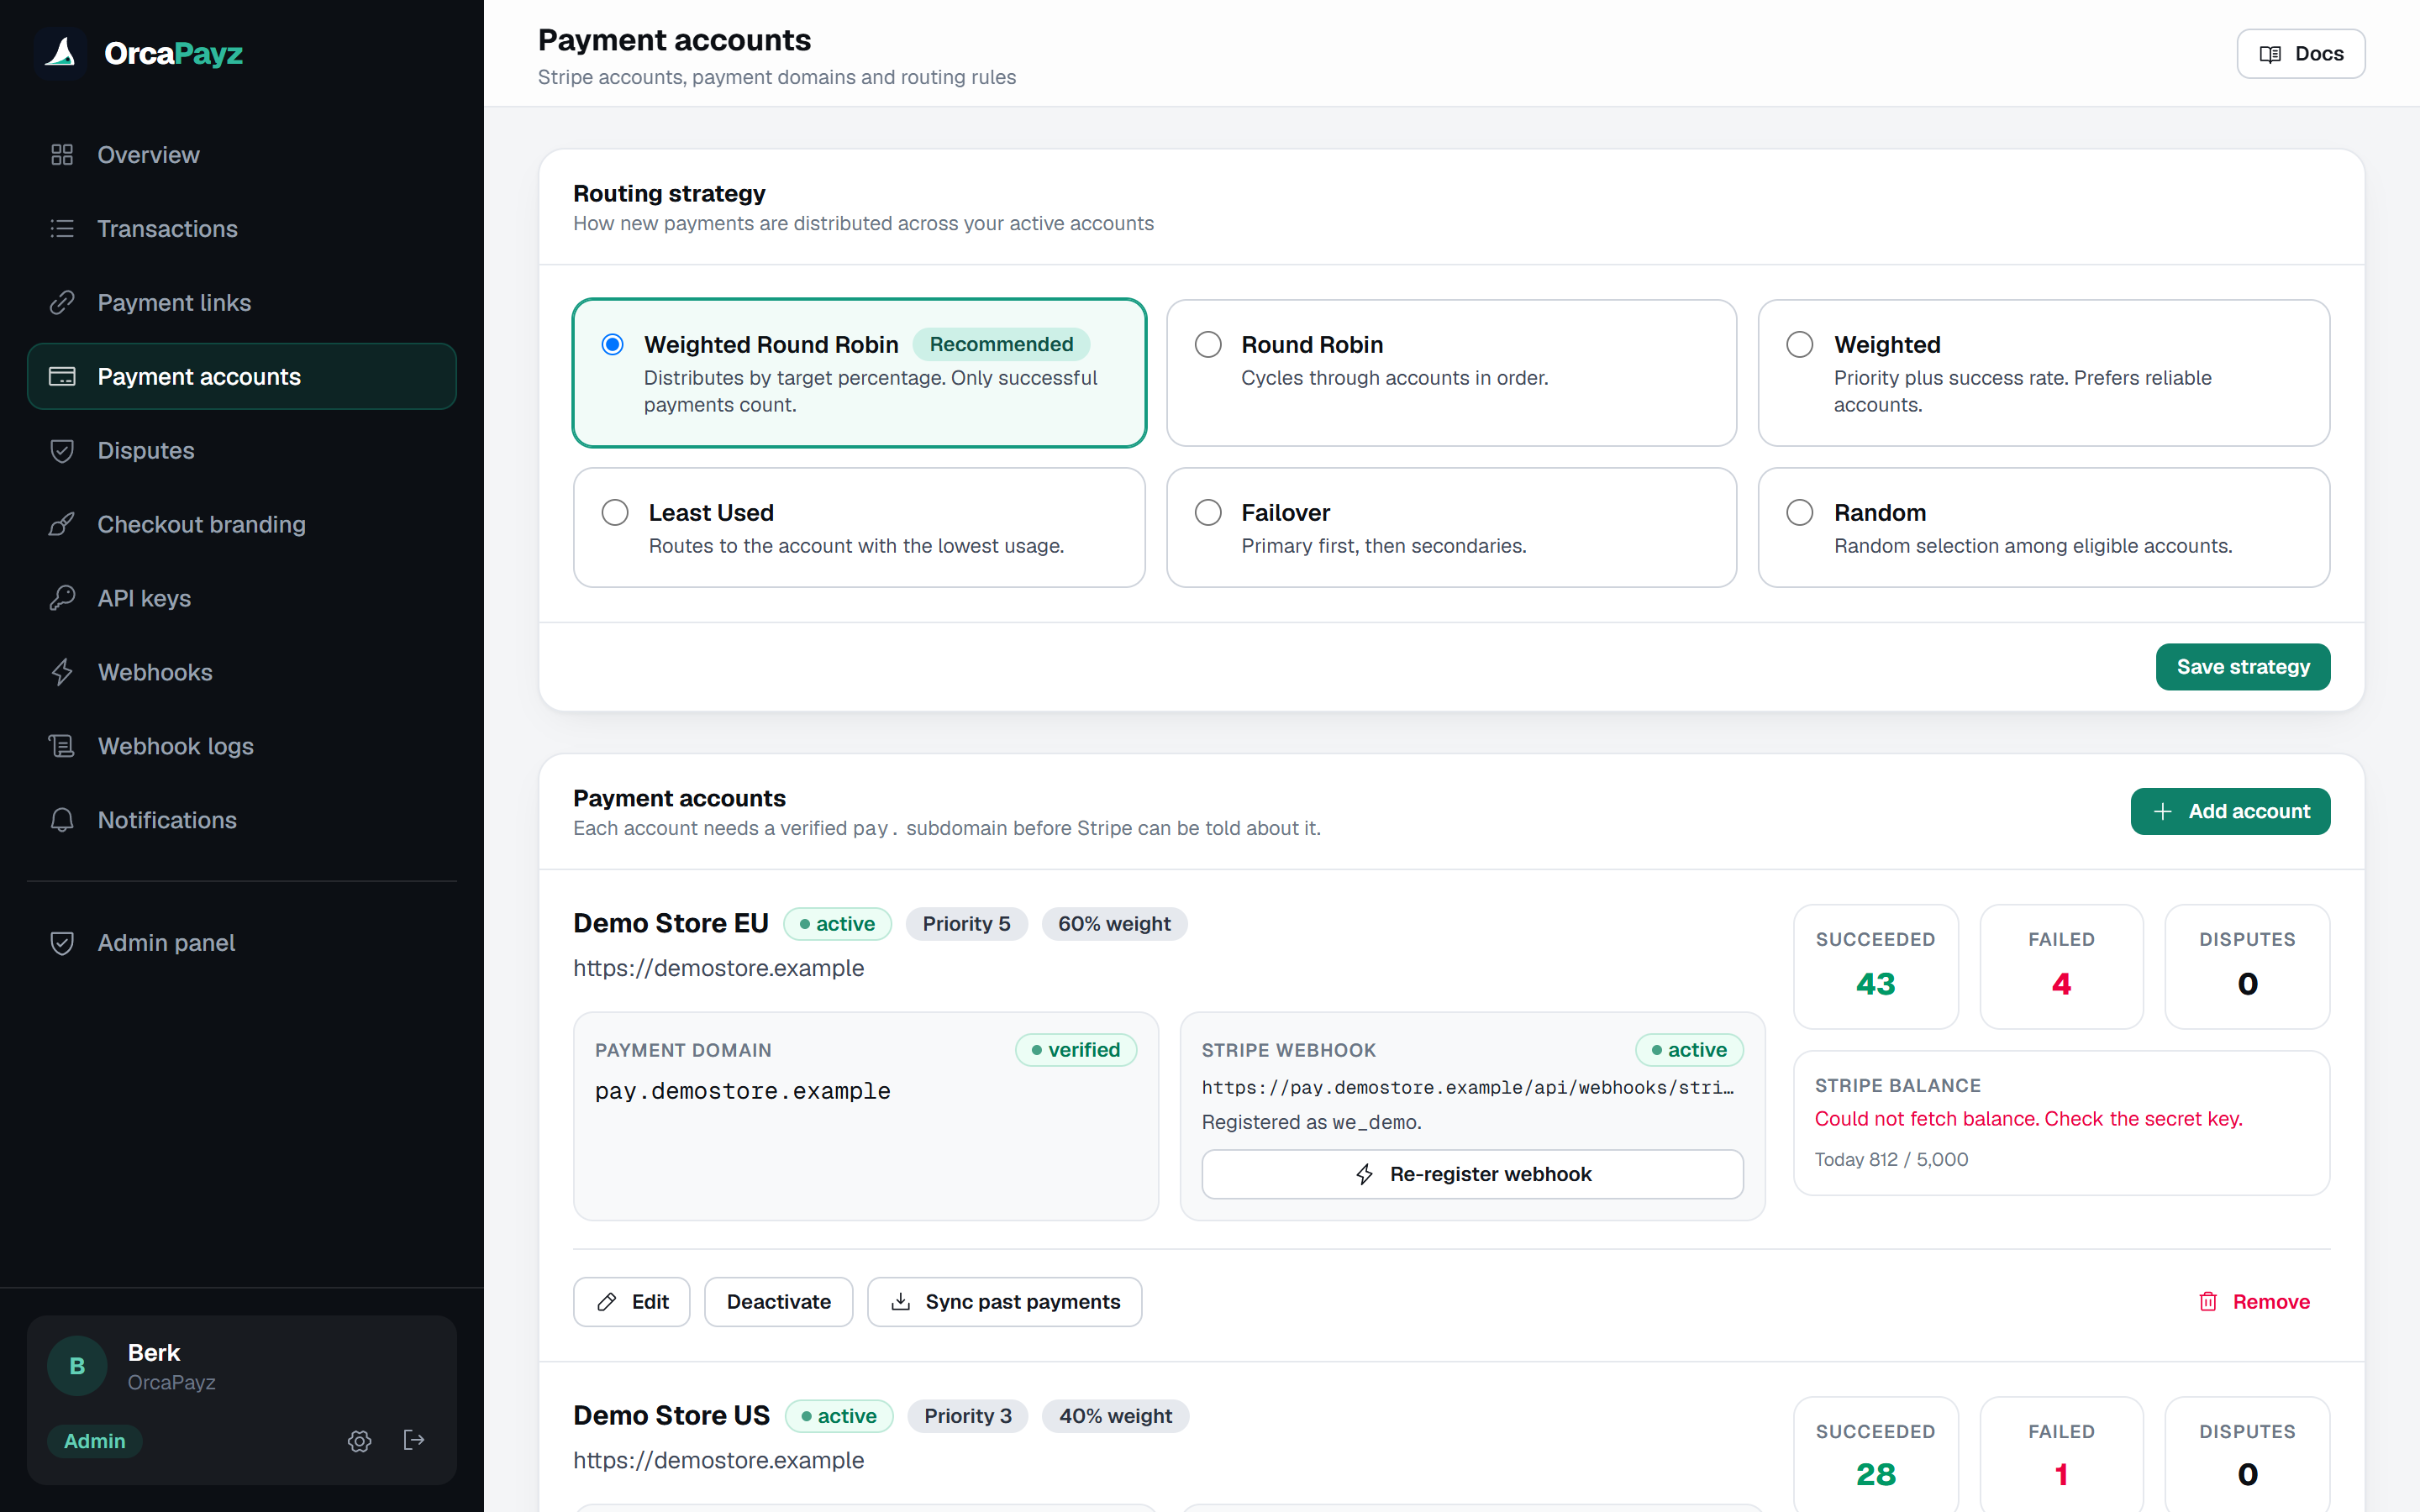
Hop 02 is configured here: the traffic split across accounts, the auto-pause rule, and per-account limits. The router reads this on every request.
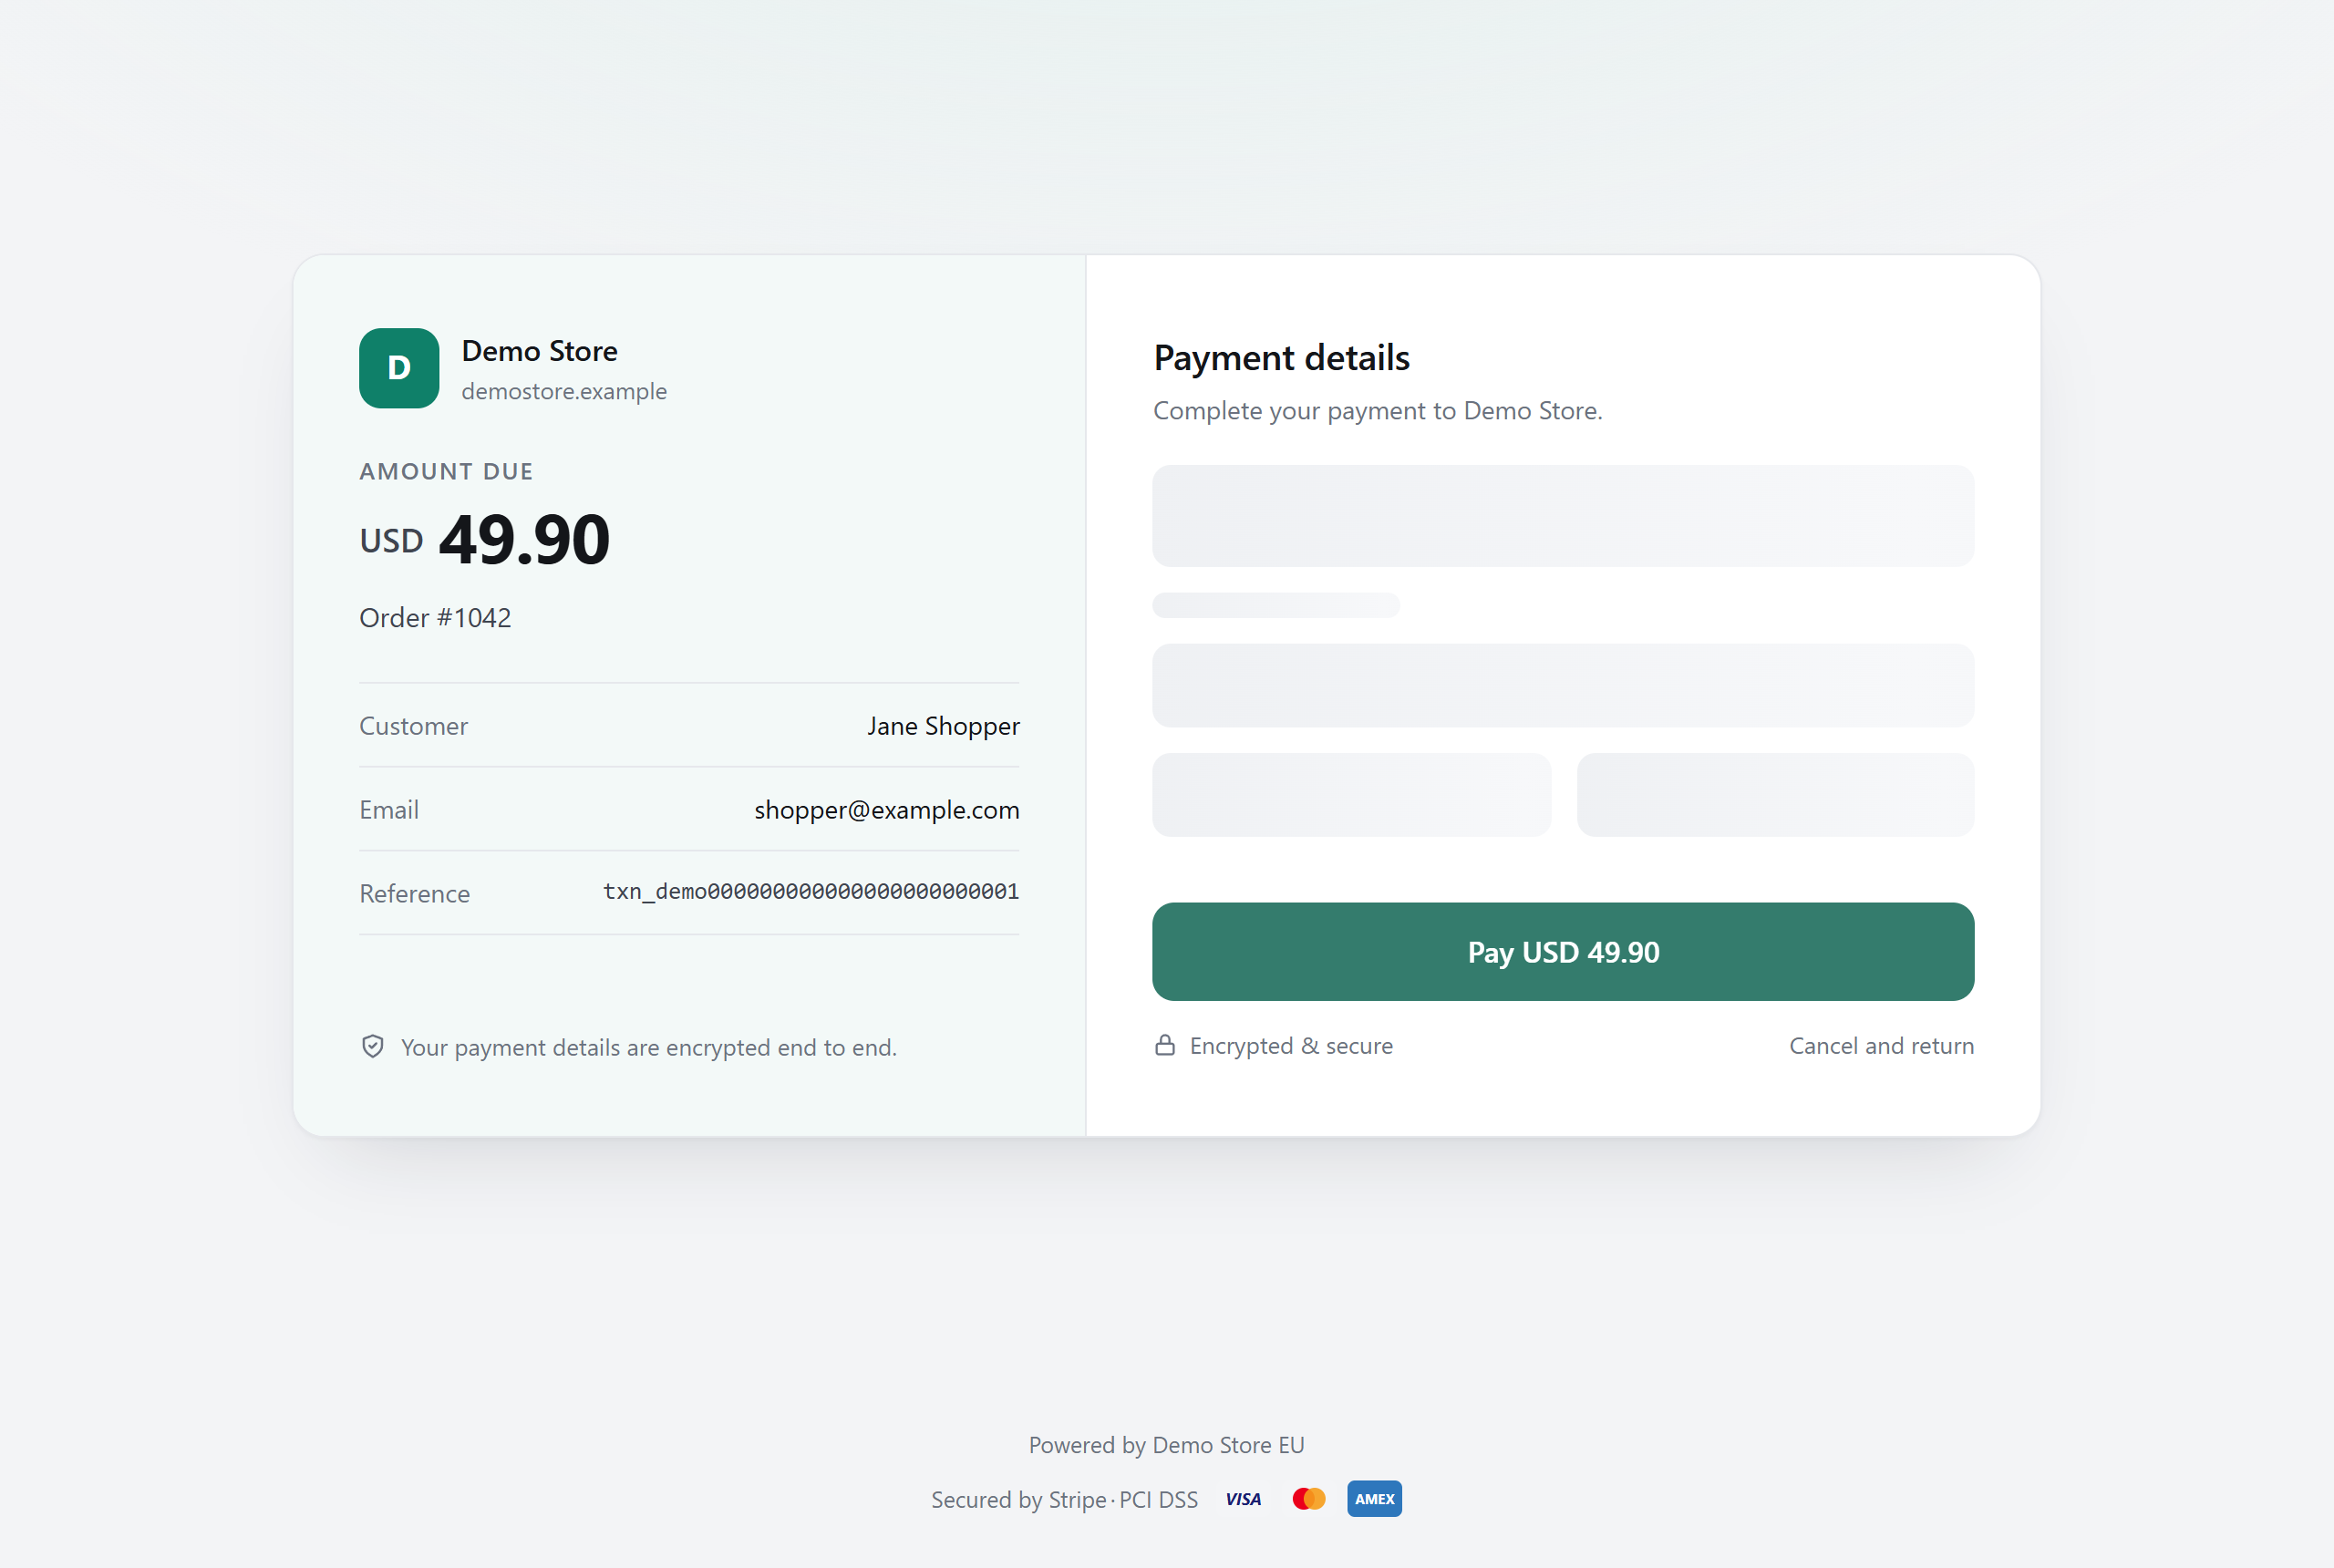
Why Stripe never sees a platform.
Every request that carries the shopper or Stripe is served from pay.yourdomain.com: the checkout page, the Stripe.js script, the return redirect and the inbound Stripe webhook. From Stripe's side the integration lives on your domain with your keys, exactly like a direct one. OrcaPayz is only in the path between your server and ours.
- Checkout origin: your domain.
- Stripe webhook target: your domain.
- Stripe keys: yours, stored encrypted and used only on your behalf.
- Card data: handled by Stripe Elements, never by us.
Route your first payment this week.
Connect an account, add one DNS record, make one API call. 7 days free, no card required.